Learn how to invite a user to your workspace.
Table of Contents
There are two ways to add a user to your workspace:
- Adding a user from the summary page "My Workspaces".
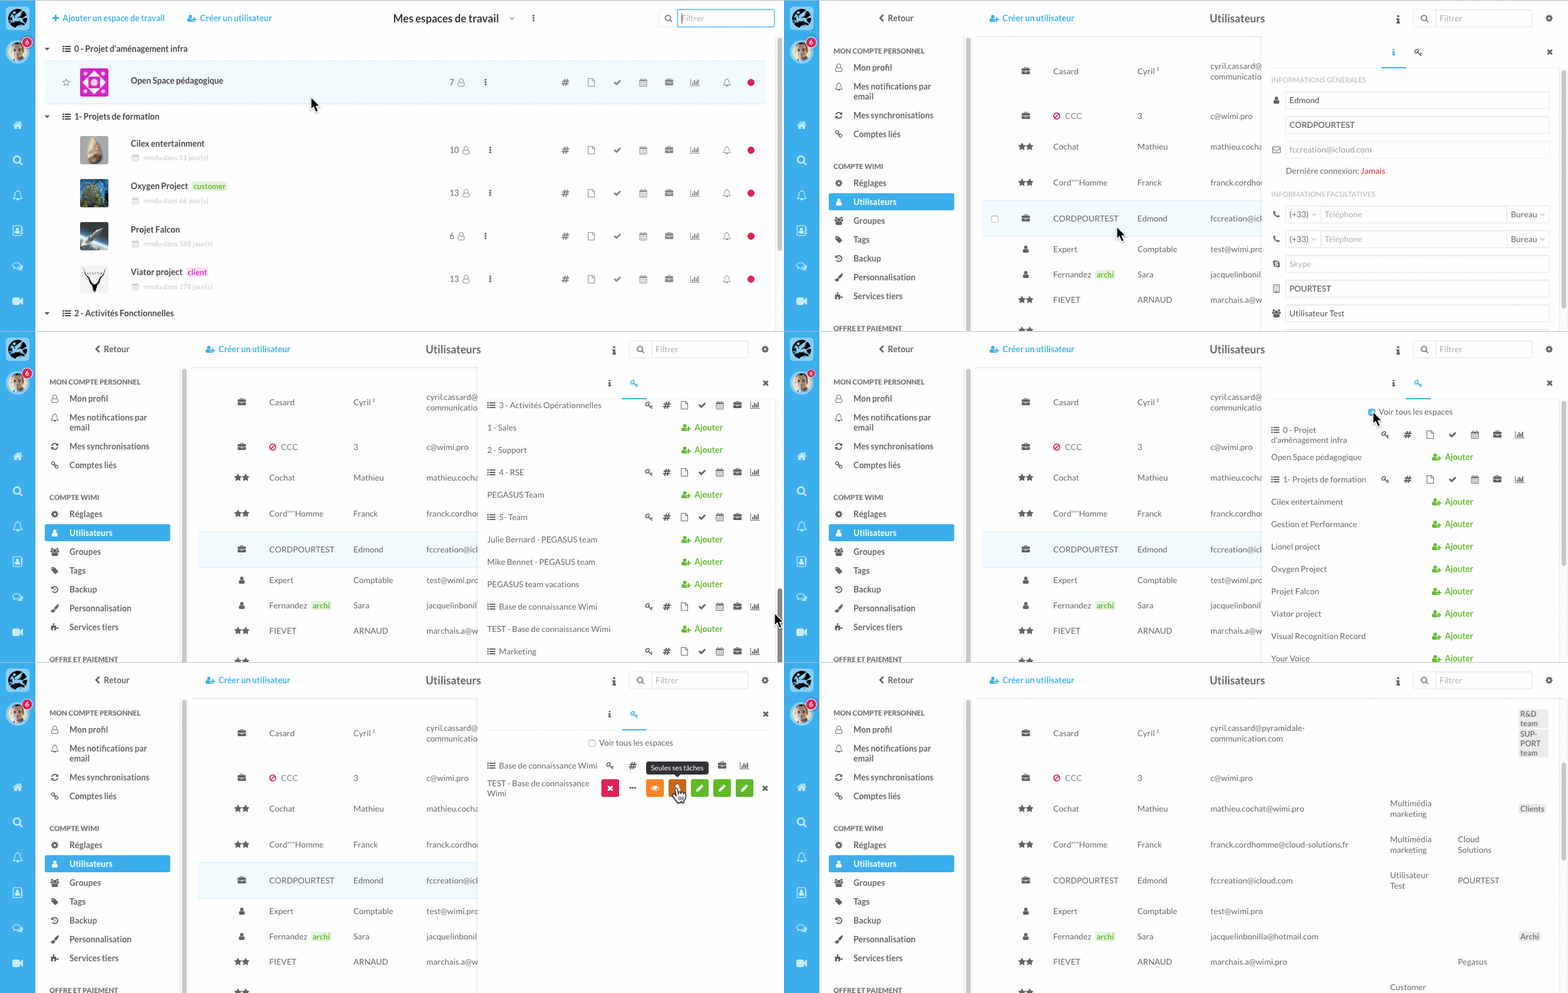
- Adding a user from the Users section of the account (reserved for administrators).
How do I add a user from a workspace?
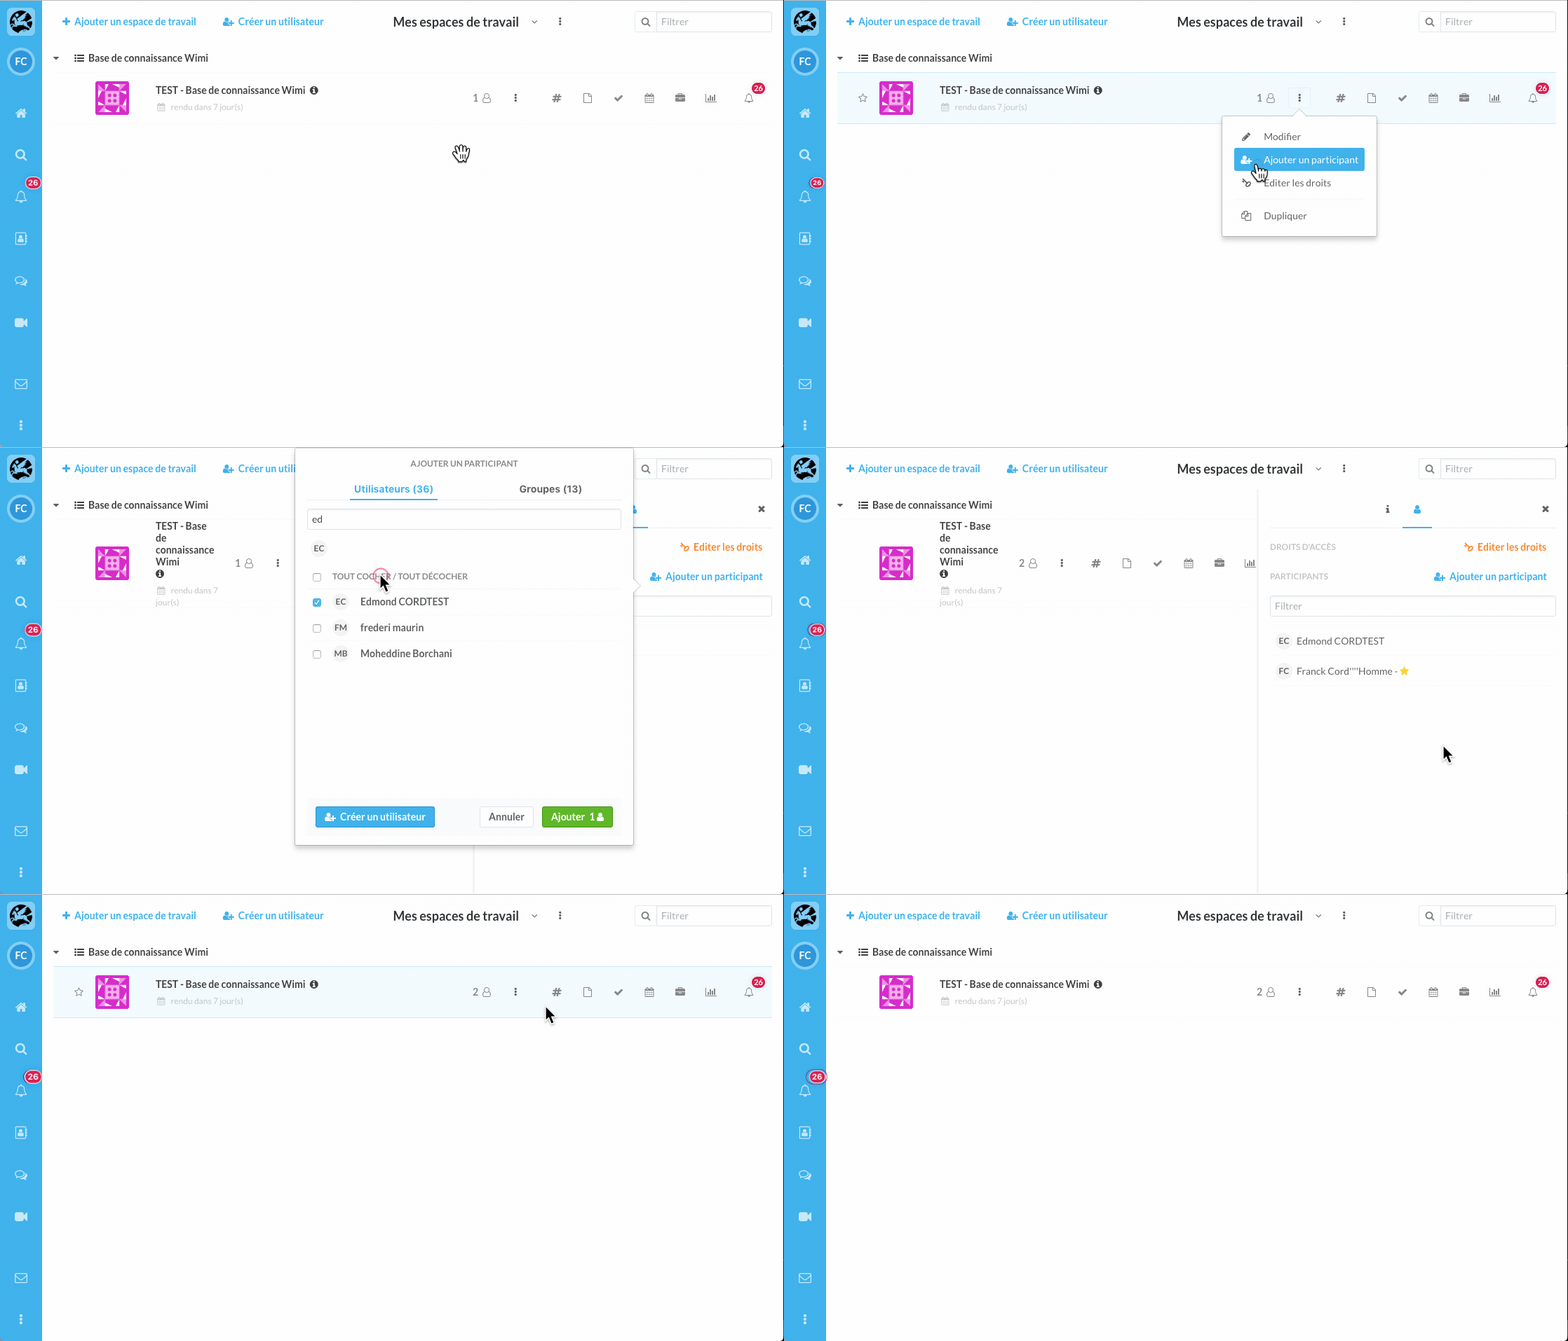
Case n°1: the user is present on your Wimi
Click on the Options (...) of the workspace for which you want to add a user.
- Click on + Add a participant.
- Select the user of your choice.
- Click Add to confirm its addition to the workspace.
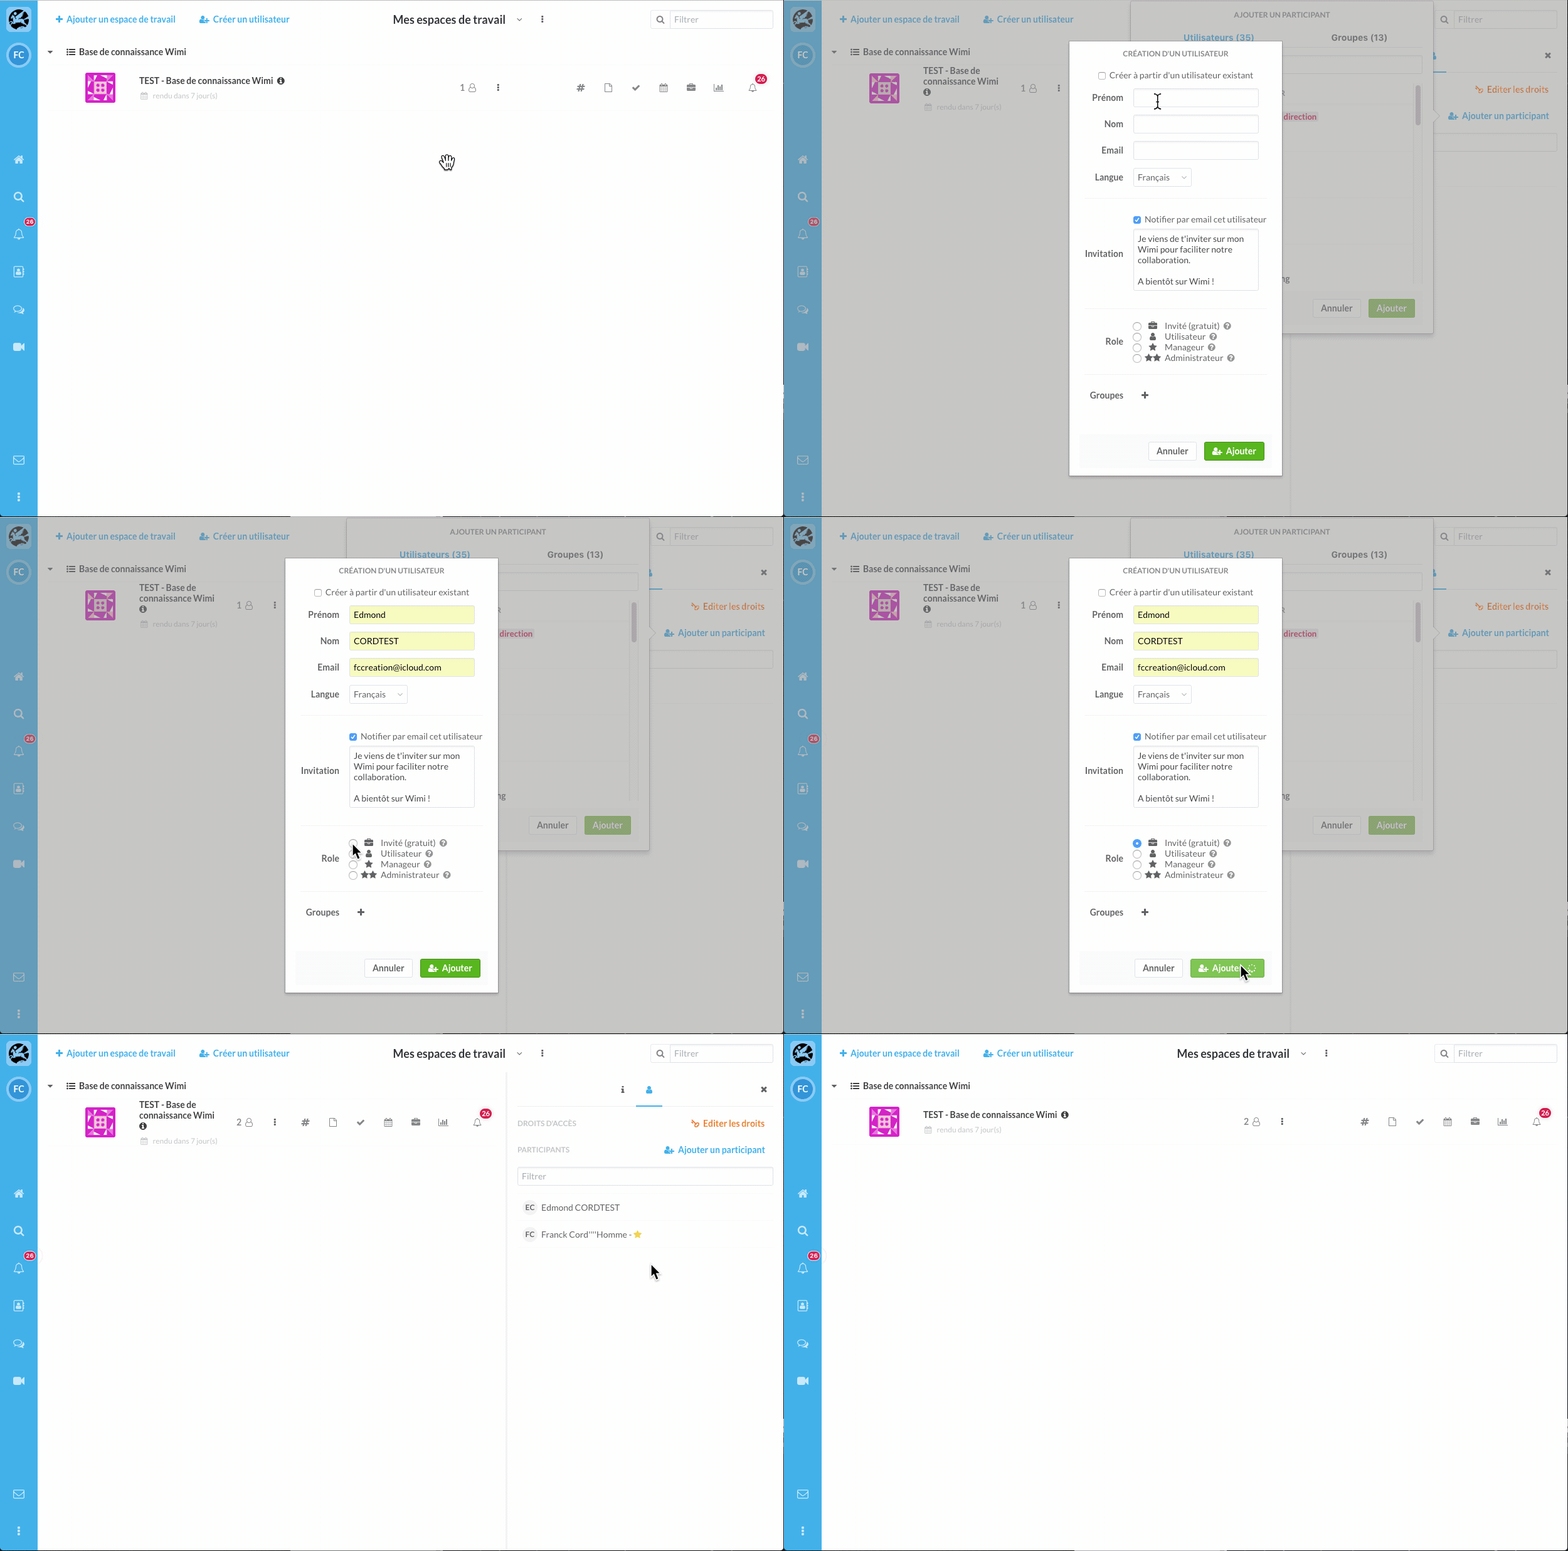
Case n°2: the user is not present on your Wimi
The access rights of your users on the modules of the workspaces
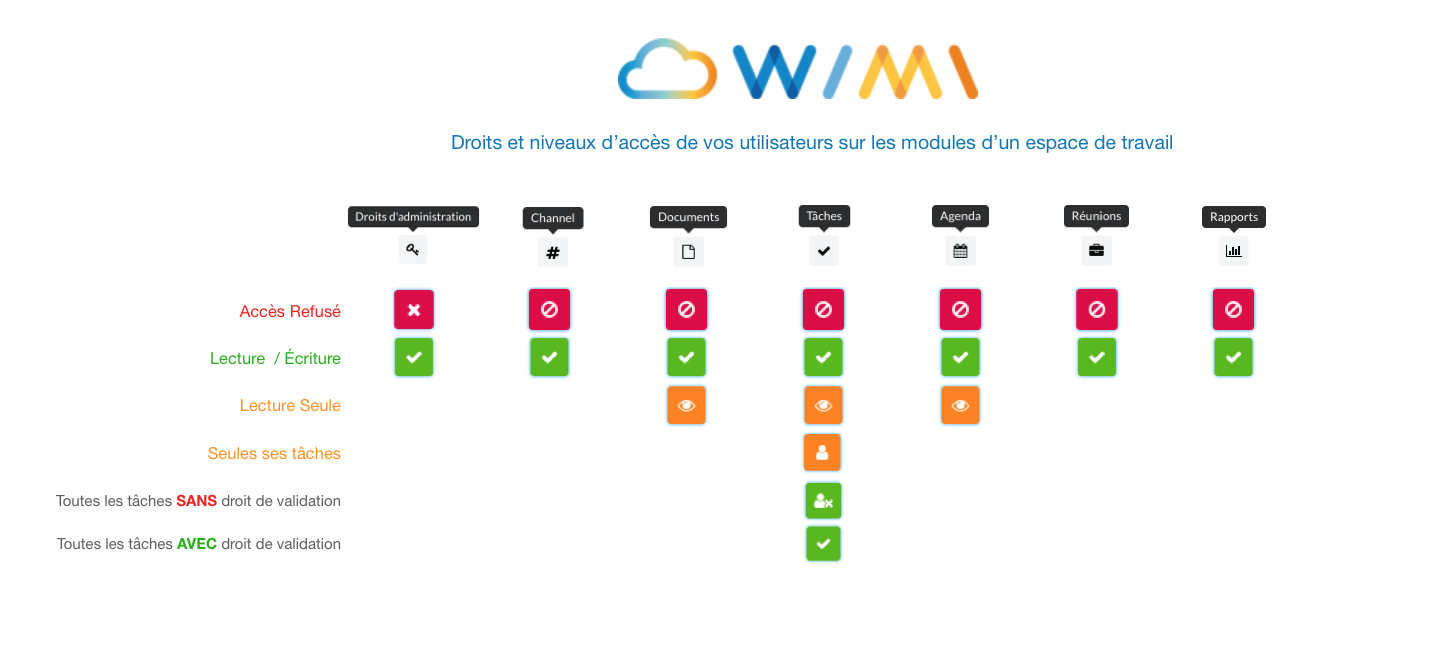
There are 3 levels of access in Wimi, symbolized by 3 colors.
- Red for access denied.
- Orange for authorized read-only access.
- Green for authorized read and write access.
Access rights for modules in a workspace
How to modify the access rights of a user on a workspace?
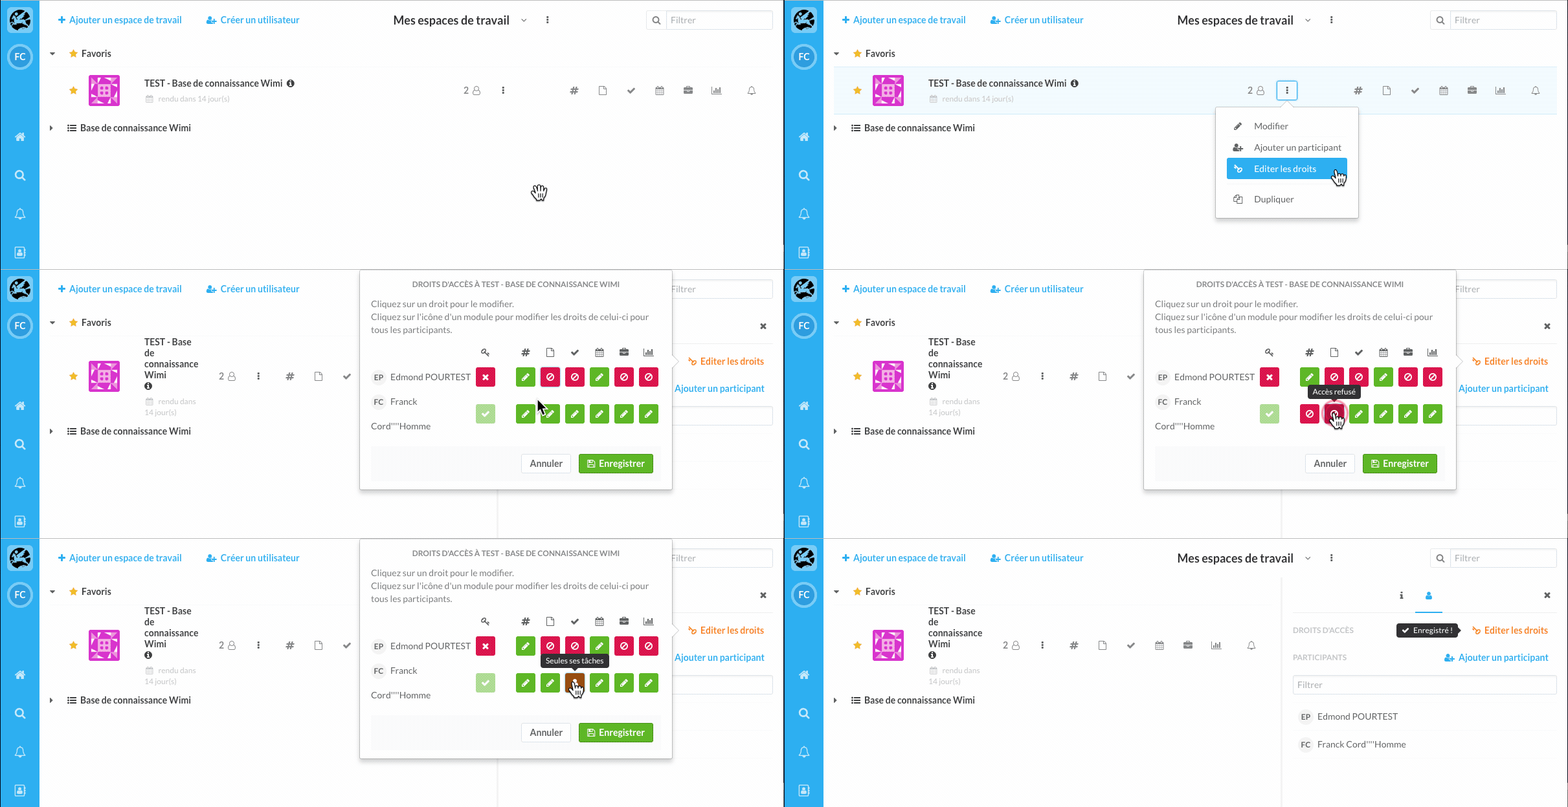
Click in the Options (...) of a workspace, then click Edit rights.
- Click on the icon of a module to modify the rights of all users or,
- Click on the color pictogram to modify the rights per user.
How do I add a user from the Users section of the account? (for administrators only)
Go to Wimi Preferences and click on Users.
- Click on the user name to add to display the details panel on the right.
- Click on the key pictogram and check the See all workspaces box.
- Click + Add to add the user to the workspace.
- Define its access rights on the modules, by clicking on the pictograms.
