Discover how to synchronize Wimi calendars on Mac OS, Windows, iOS, Androïd.
Table of content
How to synchronize your Wimi calendars with Mac OS X Calendar (through CalDAV)?
The synchronization of Wimi calendars on Apple Calendar is bi-directional. You can add events in Wimi calendars, they will be synchronized on Calendar on your Mac and vice versa.
Selecting workspace calendars on your Wimi
Go to Wimi Preferences, click on My Account and then My synchronizations.
- Go to the section Calendar.
- Check the workspaces you want to synchronize.

Configuration of your account in your Mac Calendar App
- Launch Calendar App.
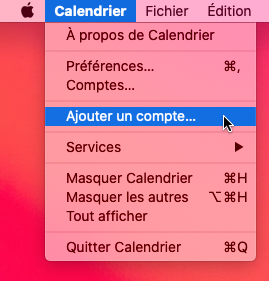
- Click on Calendar and Add Account.
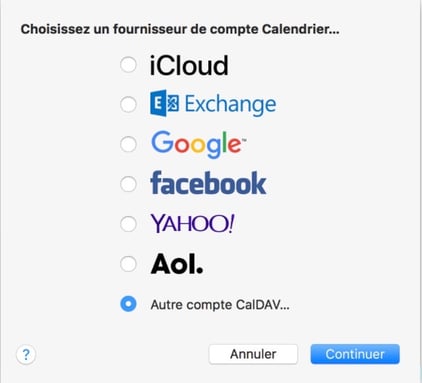
- Choose Other CalDAV Account... then click on Next.
- Select Manual in Account type drop-down menu.
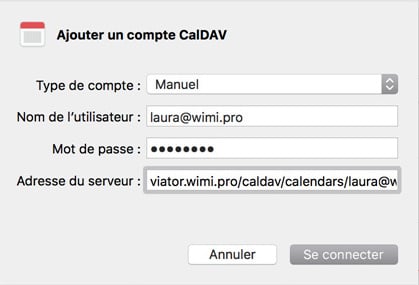
- Enter the User Name (email address that you use when logging on Wimi) and the password of your Wimi account.
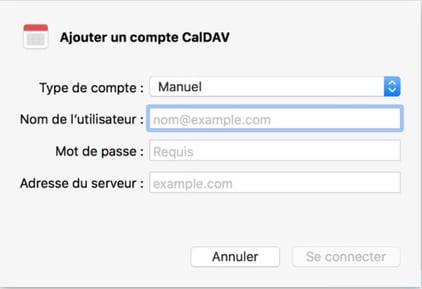
Copy the server address of your Wimi account in Preferences > My Account > My synchronizations in the section Agenda > Address (Mac OS X).
- Paste the address in the Server Address field and click on Connect.
Wimi calendars appear in the left side of the Calendar window on your Mac.
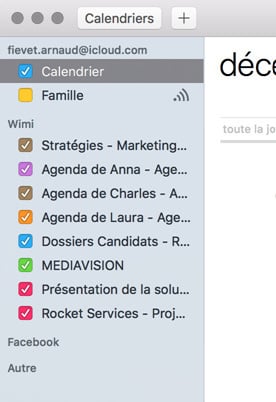
If the left side bar is not displayed, go to the menu bar and click on View > Show Calendar List.
-v7.png?width=538&height=463&name=wimi-fr-agenda-comment-afficher-la-liste-des-calendriers-wimi-dans-le-calendrier-de-macosx(2)-v7.png)
How to synchronize my Wimi events to read-only?
If you want to view your events without necessarily modifying them, this option is made for you.
- Click on the Calendar Options (...) and then on the button Subscribe.
- The Calendar app opens on your Mac and displays the URL of the Wimi calendar you wish to subscribe to.
- Click on Subscribe.
- Enter the name of the Wimi calendar related to the workspace you wish to subscribe to.
- Select On My Mac in the 3rd field "Location" and click on OK to confirm.

If you want, you can also send the calendar's link by email in order to subscribe later.
- Click on the Calendar module of the workspace in question.
- Click on the Calendar Options (...) and then on the "chain" link (on the left side of the button Subscribe).
- Click on the Envelope icon on the right side of the URL.

How to synchronize your Wimi calendars on Windows Outlook (via Outlook Connector)?
Windows does not support the CalDAV protocol. For this reason, we developed a plug-in Wimi Outlook Connector that allows a bi-directional synchronization with Outlook (compatible only with Windows Outlook version, starting from 2010 Outlook version).
Downloading and installing Wimi Outlook Connector
Go to Wimi Preferences, click on My account and then My synchronizations.
- Go to the Calendar section and click on Download Outlook Connector.

- Once downloaded, launch the software wimi-outlook-connector.exe.
.png?width=531&height=396&name=wimi-fr-agenda-autoriser-linstallation-de-wimi-outlook-connector-sur-windows-wimi-v7(1).png)
- Click Yes to allow the plug-in to be installed.
- Choose your language and click OK.
.png?width=293&height=148&name=wimi-fr-agenda-autoriser-linstallation-de-wimi-outlook-connector-sur-windows-wimi-v7(2).png)
- Click Next to launch the installation and choose the installation folder.
- Click Finish to complete the installation.
- Confirm the installation of needed dependencies.
-wimi-v7.png?width=500&height=373&name=wimi-fr-agenda-installation-de-lapplication-outlook-connector-sur-windows(1)-wimi-v7.png)
- Click Install and then Yes.
-wimi-v7.png?width=395&height=208&name=wimi-fr-agenda-installation-de-lapplication-outlook-connector-sur-windows(2)-wimi-v7.png)
Open your software Outlook.
- Click Install in order to receive all the events saved in Wimi calendars.
-wimi-v7.png?width=544&height=345&name=wimi-fr-agenda-installation-de-lapplication-outlook-connector-sur-windows(3)-wimi-v7.png)
Once in your Outlook software
- Go to the Wimi tab on the top right
- Then select Configure

Configure the connection between Wimi Outlook Connector and Outlook
Open Wimi Outlook Connector and enter the information of your Wimi account.
- Click OK to validate the connection.

All your Wimi Calendars will be displayed in the left column.
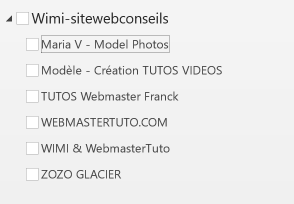
- Select the calendars from Wimi which you want to synchronize with Outlook.
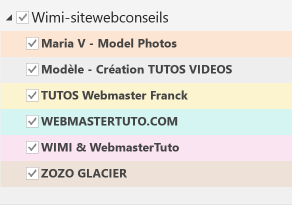
From now on, synchronization between Wimi calendars and Outlook is enabled.
How to synchronize your Wimi calendars on iOS?
As for Mac OS, the synchronization of Wimi calendars via CalDAV allows you to access all your Wimi calendars directly from your smartphone or your tablet.
- Go to Wimi Preferences, click on My Account and then My synchronizations.
- Get your login (email), the CalDAV URL and your password (the one used to connect to your Wimi) in the section Calendar.

Then in your iPhone or iPad:
- Open Settings and select Accounts and Passwords.
- Tap Add Account and then choose Other.
- Select Add CalDAV account.
- Enter your synchronization data.
- Tap Next to confirm your information.
- Tap Save to add your subscription to Wimi Calendar into CalDAV.
Your subscription to Wimi calendar is well recognized by CalDAV, it is displayed in Accounts in your Calendar app on iOS. The synchronization starts and the calendar of Wimi workspace will be displayed in Calendar on your iOS device.
How to synchronize your Wimi calendars on Android?
Android does not support the CalDAV protocol for the moment. For this reason, the synchronization of Wimi calendars is not available on this OS.
However, Wimi mobile app for Android will soon have a calendar.
